Adding subtitles, also known as closed captions, to your YouTube videos is essential for making your content accessible to a wider audience and improving engagement. Here’s how you can add subtitles to your YouTube videos both through the YouTube website and the YouTube mobile app:
How to Add Subtitles to YouTube Videos On Website
Upload Your Video:
- First, upload your video to your YouTube channel if you haven’t already.
Access YouTube Studio:
- Go to YouTube Studio by clicking on your profile picture in the top right corner of the YouTube website and selecting “YouTube Studio.”
Select Your Video:
- In YouTube Studio, find the video you want to add subtitles to and click on it to open the video details.
Navigate to Subtitles:

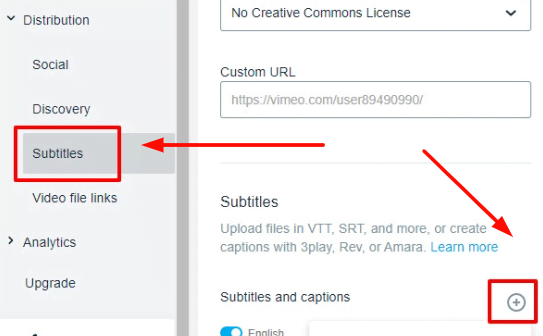
- On the left sidebar, click on “Subtitles.”
Add Subtitles:

- Click the “Add” button to start the process of adding subtitles.
Choose Language:
- Select the language for your subtitles.
Select Subtitle Type:
- You have a few options:
- Upload a file: If you already have a subtitle file (e.g., .srt) for your video, you can upload it.
- Transcribe and auto-sync: YouTube can automatically transcribe your video’s audio and attempt to synchronize it with the video.
- Create new subtitles or closed captions: You can manually create and sync subtitles within YouTube Studio.
Add Subtitles:

- Depending on your choice, follow the on-screen instructions to add subtitles or upload your subtitle file. You can also adjust the timing and content as needed.
Review and Publish:
- After adding subtitles, review them to ensure accuracy and synchronization with your video. Once you’re satisfied, click “Publish.”
Save Changes:
- Don’t forget to click “Save” on the video details page to save your subtitle changes.
How to Add Subtitles to YouTube Videos On Mobile App
Adding subtitles through the YouTube mobile app is primarily available for videos you’ve already uploaded with automatic captions or uploaded caption files.
Open the YouTube App:
- Launch the YouTube app on mobile device.
Tap on Your Profile Picture:
- Click on your profile picture in the top right corner to access your channel.
Select “Your Videos”:
- Watch and choose “Your videos” to view the list from your uploaded videos.
Pick the Video:
- Tap on the video you want to add subtitles to.
Tap on “Edit Video”:
- Below the video title, tap on “Edit video.”
Scroll Down to “Video Details”:
- Go through down to the “Video details” section.
Edit Captions:

- If you have automatic captions or uploaded caption files, you’ll see an “Edit” option under “Captions.” Tap on it.
Add or Edit Subtitles:

- Depending on your video’s existing captions, you can add or edit them here.
Save Changes:
- After making any changes, tap “Save.”
Update Video Details:
- To finalize your changes, scroll back up and tap “Save” in the “Video details” section.
Our Opinion
Creating and syncing subtitles manually on the mobile app can be more challenging, and it’s often easier to do this on a computer through the YouTube Studio. Mobile app functionality may vary, so it’s best suited for minor edits or working with existing caption files.
